Unlock the Secret to Fluffy Homemade Garlic Knots Better Than Any Restaurant
Imagine sinking your teeth into a warm, pillowy soft roll, fragrant with rich garlic butter and dusted generously with Parmesan cheese. A true culinary delight, these aren't just any ordinary bread rolls; we're talking about the legendary garlic knots. While many of us have enjoyed these savory treats from our local pizza parlor, a secret, more satisfying experience awaits in your own kitchen. Making homemade garlic knots isn't just easy; it promises a superior flavor and texture that no restaurant can truly replicate. Prepare to discover the simple steps to creating a batch of fluffy, golden-brown masterpieces that will make you wonder why you ever bought them elsewhere.Why Homemade Garlic Knots Are a Game Changer (and Better Than Any Restaurant)
There's a distinct magic that happens when you bake something from scratch, especially when it comes to something as comforting as bread. Homemade garlic knots offer an unparalleled freshness and flavor profile that pre-made versions simply can't match. When you craft them yourself, you control the quality of every ingredient – from the robust garlic to the creamy butter and the aged Parmesan. This level of control means you can customize the garlic intensity, ensure the dough is perfectly proofed for maximum fluffiness, and serve them at peak warmth, straight from the oven. Beyond taste, there's the sheer satisfaction of the process. The kneading of the dough, the aroma of yeast rising, the transformation of simple ingredients into a golden-brown delicacy – it's a therapeutic and rewarding experience. Plus, they’re incredibly versatile. Whether you're looking for an indulgent snack, a perfect side for your pasta dish, or a delightful appetizer, these Easy Homemade Garlic Knots: Perfect for Dipping or a Savory Side Dish will always impress.The Secret to Fluffy, Golden Brown Garlic Knots: The Dough
The foundation of any great bread product is its dough, and garlic knots are no exception. The key to their signature soft, fluffy interior lies in a well-made yeasted dough, enriched with specific ingredients that contribute to its tender texture.Ingredients You'll Need
To embark on your garlic knot journey, gather these basic, likely already-in-your-pantry ingredients:
- All-Purpose Flour: The primary structure of your knots. For best results, weigh your flour rather than measuring by volume. Spooning it gently into a cup and sweeping off the excess is a good alternative to prevent over-packing, which can lead to a dense dough.
- Active Dry or Instant Yeast: The leavening agent responsible for that wonderful rise and airy texture.
- Warm Milk (or Water): Milk enriches the dough, making it softer and more tender than water alone. Ensure it's warm (around 105-115°F / 40-46°C) to activate the yeast without killing it.
- Melted Butter: Contributes to the richness, flavor, and softness of the dough.
- Olive Oil: Adds another layer of flavor and helps create a tender crumb.
- Sugar: A little bit of sugar helps to feed the yeast, promoting a stronger rise, and contributes to the golden-brown crust.
- Salt: Essential for flavor balance and controlling yeast activity.
- Optional: Potato Flour or Mashed Potato Flakes: A baker's secret! Adding a small amount of potato flour or instant mashed potato flakes can enhance the softness and moisture retention of your dough, resulting in an even more pillowy knot. Whisk it with the dry ingredients to prevent clumping.
Crafting the Perfect Dough: Kneading & Proofing
Once your ingredients are assembled, it's time to bring them together. Whisk your dry ingredients first to ensure even distribution, especially if you're using potato flour.
- Combine Wet and Dry: Stir in your warm milk (or water), melted butter, and olive oil with the dry ingredients.
- Knead to Perfection: This is where the magic happens. You can knead the dough by hand, using a stand mixer with a dough hook, or even in a bread machine. The goal is to develop the gluten in the flour, creating a smooth, elastic dough that springs back when gently poked. Kneading typically takes 5-10 minutes by machine or 10-15 minutes by hand. Add a little extra flour if too sticky, or a tablespoon of water if too dry, until you reach the desired consistency.
- First Proof: Lightly grease a large bowl, place your dough inside, turning it once to coat, then cover with plastic wrap or a clean kitchen towel. Allow it to rise in a warm, draft-free place for about 1 to 1.5 hours, or until it has visibly doubled in bulk. This crucial step allows the yeast to work its magic, creating air pockets that lead to a fluffy texture.
Twisting, Baking, and the Magic Glaze
With your dough perfectly proofed, you're just a few steps away from experiencing the best garlic knots you've ever tasted.Forming Your Knots
Gently punch down the risen dough to release the air. Transfer it to a lightly floured surface. Divide the dough into 16-20 equal pieces. The exact number depends on how large you want your individual knots. Roll each piece into a rope, approximately 10-11 inches long. The key to a good knot is to make the ropes thin enough to tie easily without breaking. Then, tie each rope into a simple overhand knot. You can tuck the loose ends into the center or under the knot for a neater appearance. Place your formed knots on a lightly greased or parchment-lined baking sheet, leaving some space between them.
The Baking Process for Golden Perfection
Cover the formed knots again and let them rise for a second time, for about 30-45 minutes, or until they look noticeably puffy. While they’re having their second rise, preheat your oven to 350°F (175°C). For an extra crackly-crunchy crust reminiscent of a brick oven, preheat a baking stone in your oven during this time. Once puffy, transfer the knots to the hot oven (on the baking sheet or carefully onto the stone using parchment paper). Bake for 15-20 minutes, or until they are set and just lightly golden brown on top. Remember, we're aiming for soft and fluffy, not rock hard, so avoid overbaking.
The Irresistible Garlic Butter Glaze
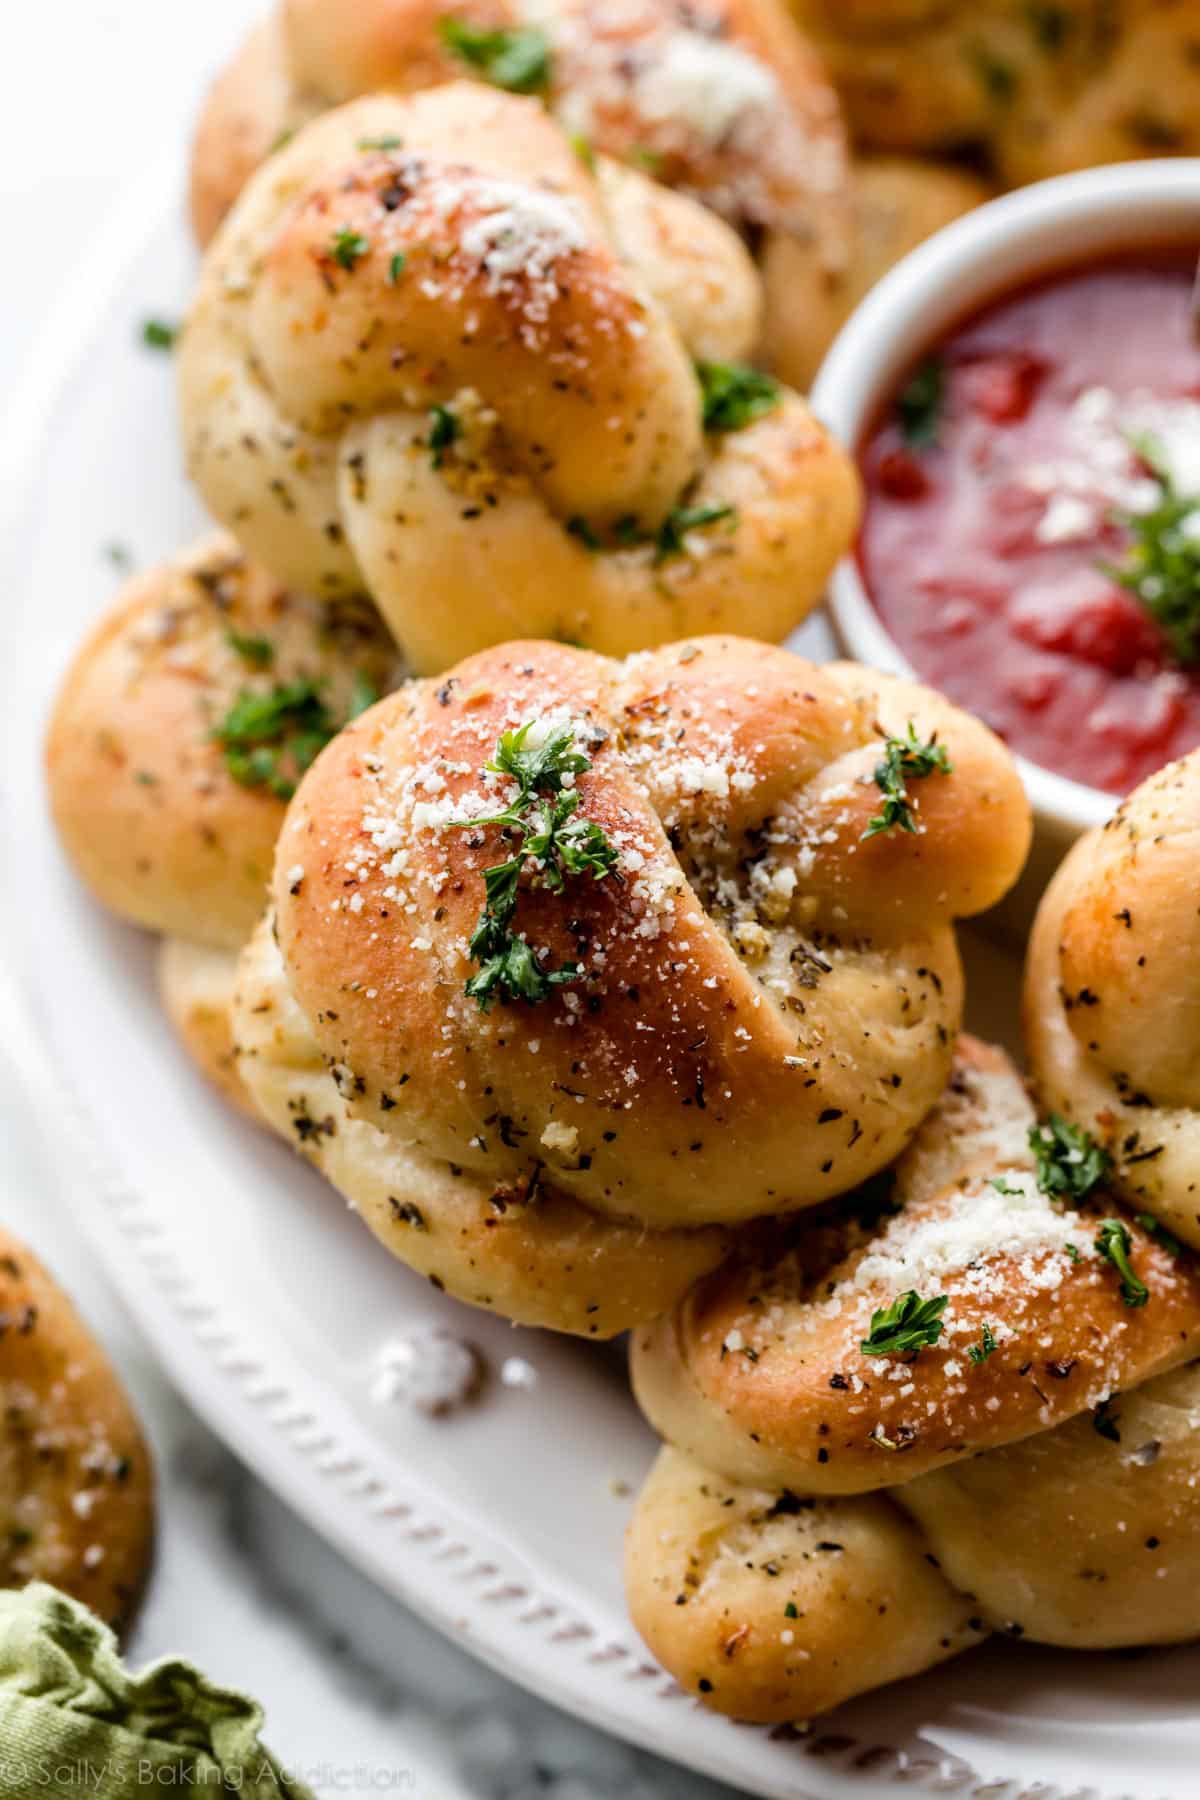
This is where the garlic knots truly earn their name! While your knots are still warm, prepare your glaze. Melt 4-6 tablespoons of butter and whisk in 3-4 cloves of finely minced fresh garlic (or 1-2 teaspoons of garlic powder for a milder flavor). For an added layer of aroma, you can also stir in a pinch of dried Italian seasoning or a sprinkle of fresh parsley. As soon as the knots come out of the oven, generously brush or drizzle them with this aromatic garlic butter. The warmth of the knots will absorb the butter, infusing every crevice with incredible flavor. Finish by sprinkling a generous amount of freshly grated Parmesan cheese over each knot. Some like to serve them with extra cheese on the side!
Serving Suggestions: Elevate Your Garlic Knot Experience
While irresistible on their own as a snack, especially when served with a vibrant marinara sauce for dipping, garlic knots are incredibly versatile. Think of them as the ultimate Italian dinner roll, ready to complement a wide array of meals:
- Pasta Perfection: They are the quintessential accompaniment to any pasta dish, from a classic spaghetti and meatballs to a rich lasagna or a creamy fettuccine Alfredo.
- Soup & Salad Companion: Dip them into hearty minestrone, tomato soup, or simply enjoy alongside a fresh garden salad for a complete light meal.
- Appetizer Star: Serve them on a platter for gatherings, perhaps with a flight of dipping sauces – marinara, pesto aioli, or even a spicy olive oil.
- Beyond Italian: Don't limit yourself! They pair surprisingly well with roasted chicken, grilled steak, or even as a unique side for a weekend brunch.
- Wine Pairing: A robust red wine like Chianti or a crisp white like Pinot Grigio can perfectly complement the savory richness of the garlic knots.
For more inspiration on how to perfect your bake and achieve that ultimate rich garlic butter and Parmesan perfection, check out our guide on Bake Golden Brown Garlic Knots: Rich Garlic Butter & Parmesan Perfection.
Pro Tips for Garlic Knot Perfection
- Don't Rush the Proof: Allowing the dough ample time to rise is crucial for a light, airy texture. Cold environments will slow it down; a warm spot near a sunny window or in a slightly warm, turned-off oven works wonders.
- Fresh Garlic is King: While garlic powder works in a pinch, fresh minced garlic in your butter glaze delivers a punchier, more authentic flavor.
- Season Your Glaze: Don't be afraid to experiment with your garlic butter. A touch of dried oregano, basil, or a blend of Italian herbs can add depth.
- Serve Warm: Garlic knots are best enjoyed fresh from the oven, when the butter is still melting and the cheese is soft. Reheating in a toaster oven or microwave can refresh them, but nothing beats that initial warmth.
- Storage: Store leftover garlic knots in an airtight container at room temperature for 1-2 days, or freeze for longer storage. Thaw and reheat for a quick treat.
- Dough Ahead: You can make the dough ahead of time and let it do its first proof in the refrigerator overnight. Just bring it to room temperature for about an hour before dividing and shaping.
There's an undeniable joy in creating something delicious from scratch, and homemade garlic knots embody that joy perfectly. They’re soft, incredibly flavorful, and, yes, truly better than anything you'll find at a restaurant. With this comprehensive guide and a little bit of love, you're now equipped to unleash your inner baker and craft a batch of these golden, garlicky delights. So, gather your ingredients, clear your counter, and get ready to indulge in the warm, fluffy, garlic-infused perfection that only homemade can offer. Your taste buds (and your family) will thank you!
